
Make your own MarshMallow

Smore’s may be an American creation, but the marshmallow itself dates back to ancient folk medicine. Ancient Egyptians sweetened sap from the mallow plant with honey, formed it into soft balls, and gave it to children to suck on for sore throats. Once a remedy, now a super sticky, sugar overdose.

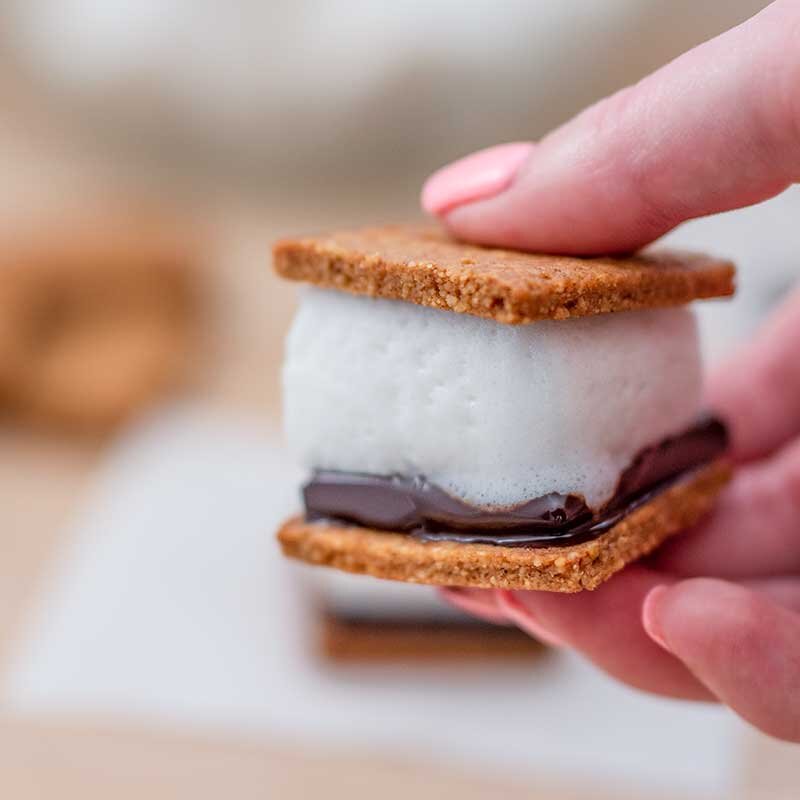
I made these s’mores all from scratch! Making the marshmallow is a bit sticky (obviously!), and homemade crackers/chocolate does take about a day. But the outcome was well worth it!
Recipe below, along with some mallow variations. Don’t forget just the tea itself us simplest and gives you all the healing benefit.

made with mallow!
Marshmallow Root Marshmallows Recipe
This combines a traditional marshmallow root extraction with modern use of gelatin for the perfect modern marshmallow.
Ingredients:
For the extract:
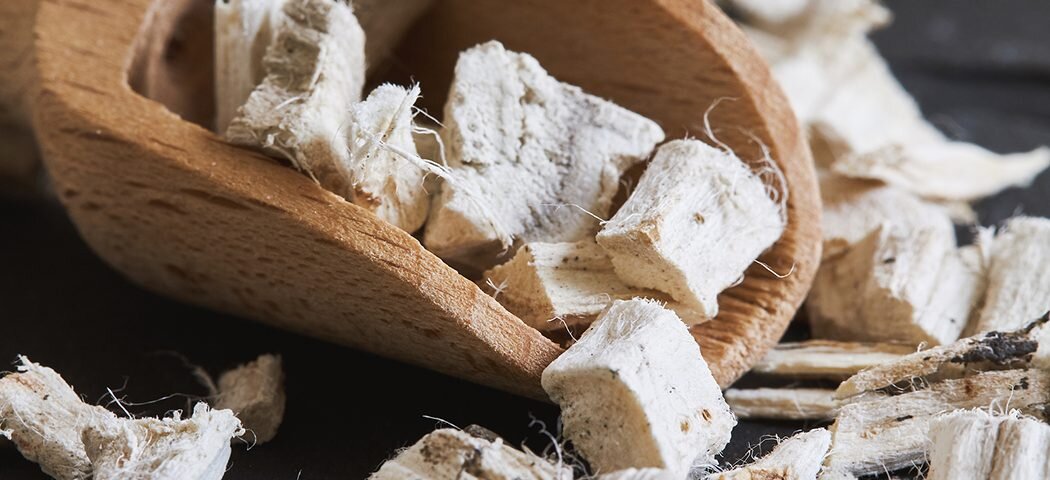
1/4 cup dried marshmallow root
2 cups cold filtered water
For the marshmallows:
1 cup marshmallow root extract (strained, from above)
3 tablespoons gelatin powder
1/2 cup honey or maple syrup
pinch salt (1/4 tsp or less)
1 vanilla bean (or 1 teaspoon vanilla extract)
1/4 cup arrowroot/cornstarch for dusting (swerve powdered sugar can also be used)
Tools:
candy thermometer (laser ones are fun!)
hand mixer
silicone spatula
Instructions:
Day 1 - Make the Extract:
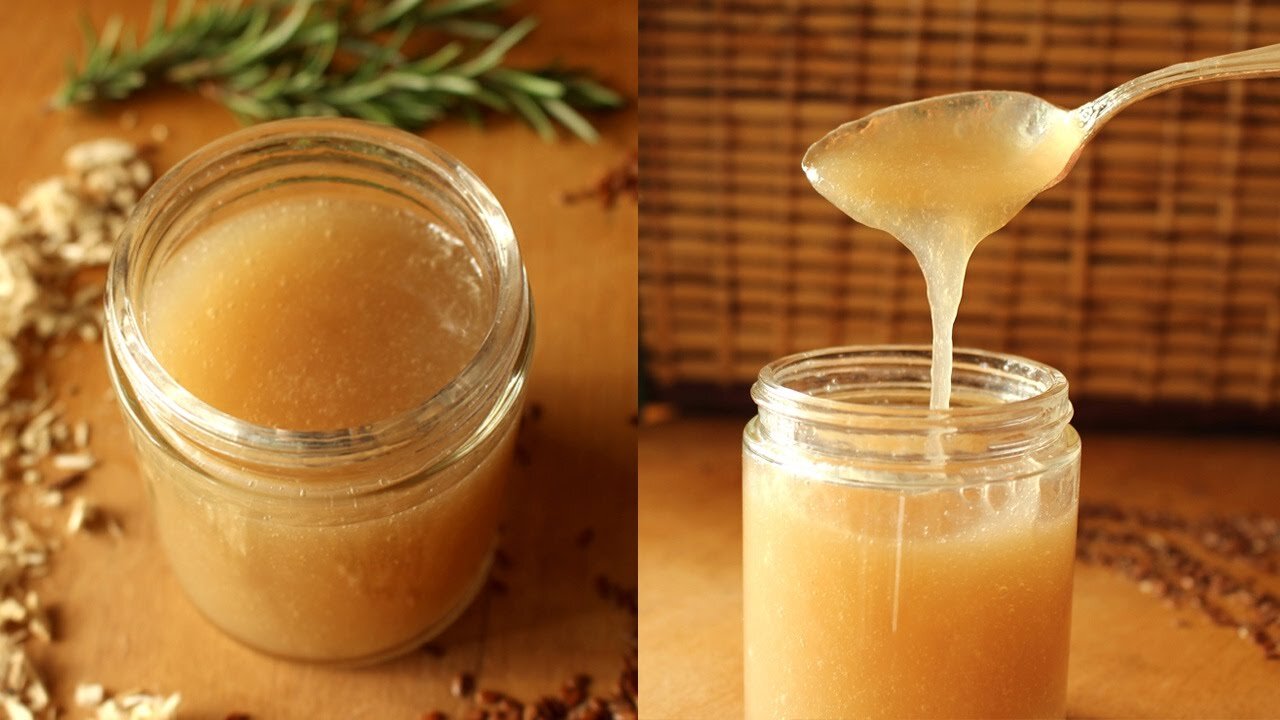
Combine marshmallow root and cold water in a glass jar (1/4 c root to 2 cups water)
Let sit 8-12 hours at room temperature, stirring occasionally
Strain through cheesecloth, squeezing thoroughly
You should have about 1-1/2 cups of thick, slippery extract at the end
Note: You could re-use the root for tea! Just pour hot water over the root and let sit 15 minutes and strain, or place the root in a sauce pan, pour water over and gently simmer, NOT boil, for 15 minutes. No waste! More notes on the tea below.
Day 2 - Make Marshmallows:
Bloom the gelatin: Pour 1/2 cup of the cold extract into your stand mixer bowl. Sprinkle gelatin over it and let sit while you make the syrup.
Make the syrup: In a heavy saucepan, combine remaining 1/2 cup extract, honey or syrup, and salt. Cook over medium heat, stirring until sugar dissolves. Stop stirring and let it boil until it reaches 240°F (soft ball stage) - about 7-10 minutes. Best to not touch it once it gets to the higher heat, to avoid risk of burning.
Prep
If using real vanilla, cut the vanilla bean open and use the back end of a butter knife to scrape out the seeds, set to the side. Reserve the pods for hot tea infusion, or let sit in carrier oil for extraction!
Layer parchment inside an 8x8 glass pan. Sprinkle with arrowroot powder.
Whip it: (Tip: You could use a buddy here). With mixer on low, slowly pour the hot syrup into the gelatin mixture. Gradually increase speed to high and whip for 10-12 minutes until thick, glossy, and tripled in volume. Add vanilla in the last minute.
Pour the marshmallow mixture (QUICKLY) into the lined glass pan. Dust the top generously with more arrowroot powder.
Some say let set uncovered at room temperature for at least 4 hours or overnight. But I cut it right away and find it totally ready to use!
Cut: Turn out onto a board dusted with more powder. Cut with an oiled knife into squares, or use a round cookie cutter to get a more traditional tube shape. Toss each piece in the powder mixture to coat all sides and throw into a squishy pile.
Notes from my herbalist perspective:
The marshmallow root adds genuine soothing properties and a subtle earthy-sweet flavor. You could skip it, but this is where the medicine resides! Note it could darken your marshmallows into a pretty, natural tan color, or even brown, depending how much you use!
Remember, the store bought stuff is artificially turned white with VERY unnatural processes. Be proud of that home-made look.
The mucilage can make the syrup slightly less predictable than plain water, so watch your temperature carefully
These marshmallows will be softer and have more of a "melt in your mouth" quality than store-bought. They actually taste more gourmet, soft, and fresh!
These are actually soothing for sore throats - the original medicinal purpose! Next time someone is sick, surprise them with a hand-made batch or REAL marshmallow! (But try to use honey as the sole sweetener for maximum healing).
Store in an airtight container with parchment between layers
Notes on making a Medicinal Marshmallow Tea!
The hot infusion will be much thinner and less slimy - it won't have that thick mucilage texture. It'll taste more like a traditional herbal tea, slightly sweet and earthy. It's still beneficial, just working differently - more as a general demulcent and anti-inflammatory rather than that protective throat coating.
Enhanced Sore Throat Blend by adding the following (after straining the marshmallow):
Raw honey (antimicrobial)
Fresh lemon juice (vitamin C, cuts mucus)
Fresh ginger (anti-inflammatory) - just a small piece grated
A pinch of cayenne (increases circulation, surprisingly soothing)
My favorite preparation for acute sore throat:
Make a strong overnight infusion (2 tablespoons root to 1 cup water)
Strain in the morning
Gently warm to comfortable drinking temperature (not hot!)
Add 1 teaspoon raw honey and a squeeze of lemon
Sip slowly, letting it coat your throat

Homemade Chocolate Bars!
1/2 cup + 1 tbsp cacao or cocoa powder
4 tbsp melted coconut oil
vanilla stevia to taste OR liquid sweetener:
1/4 cup cocoa powder
1/4 cup coconut oil
3 tbsp of your liquid sweetener (honey or syrup)
optional extracts, cocoa nibs, chia seeds
optional 1 extra tbsp oil or water, if it needs to be thinner
Combine coconut oil with the liquid sweetener or stevia drops.
Stir, then add the cacao powder. Stir stir stir! Stir until it gets thick.
Pour into any flat container (or candy molds or smush between layers of wax paper or in ziploc bags).
Freeze until solid, and store in the freezer.
NOTE: Once hardened, you can also melt the bars again for chocolate sauce. Or chop them up for healthy 100% sugar-free chocolate chips!

Keto Graham Crackers:
1/4 cup butter
1 egg
3 Tablespoon *Truvia OR 6 T. granulated sugar
1/2 teaspoon vanilla
1/2 cup coconut flour
1/8 cup flax meal
3/4 teaspoon baking powder
1 teaspoon cinnamon
1/9 teaspoon salt
Instructions
Cream butter, egg, sugar, and vanilla together.
Mix dry ingredients together in a bowl and then add to wet ingredients.
Refrigerate for approximately 30 minutes.
Pre-heat oven to 350.
Roll dough between 2 pieces of parchment paper until it's about 1/8-1/4 inch thick.
Place the dough, including parchment paper on a cookie sheet. Remove the top piece of parchment paper.
Use a sharp knife or pizza cutter to slice into 12 - 3x2 inch crackers. Prick small holes in the crackers (optional, this is just so they look more like graham crackers).
Bake 8-10 minutes or until golden brown.
Keto Graham Crackers, darker version
Ingredients

keto graham crackers with molasses
1/4 pound butter, softened (or 1/2 c coconut oil)
1 whole egg
1/4 cup raw honey or coconut sugar
2 tsp blackstrap molasses
1 tsp vanilla
3/4 – 1 cup coconut flour
1/4 cup arrowroot powder
1 1/2 tsp aluminum-free baking powder
2 tsp cinnamon
1/4 tsp sea salt
Directions
In a bowl, combine the dry ingredients using only 3/4 cup of the coconut flour.
In a food processor, blend together the softened butter, honey, vanilla and molasses. Add the egg and beat until incorporated into a soft batter.
Add in half of the dry ingredients to the wet ingredients. Then slowly add in the other half. If the dough is still wet and batter-like, then add more coconut flour, a tablespoon at a time. The dough should come together into a ball. When it does, you are done and can stop adding coconut flour. I used 3/4 cup and then added 2 more tablespoons.
Remove your ball of dough and cut it in half. Place each on a piece of wax paper (I like these wax paper sheets and you will see why in a minute). The dough can now be refrigerated overnight if you plan on making the crackers another time.
When you are ready to use the dough, remove from the fridge and bring to room temperature.
Place a silpat on your counter and place one of the dough discs on top. With the wax paper sheet on top of the ball, roll out with a rolling pin until the dough is 1/4 inch thick. This method will allow you to simply place the silpat on your baking sheet to bake.
Use a pizza cutter to draw lines on the dough about 2 inches apart. Use a fork to prick small holes in the dough. This will give it the authentic graham cracker look and feel and also help you separate the crackers when they are done baking.
Bake at 350 degrees F for 9 – 11 minutes. The crackers will still be soft when you remove then from the oven but brown at the edges. When they cool they will harden and be firm and crisp.
Once cooled, break apart and store in an airtight container for about a week.
Some other alternatives:
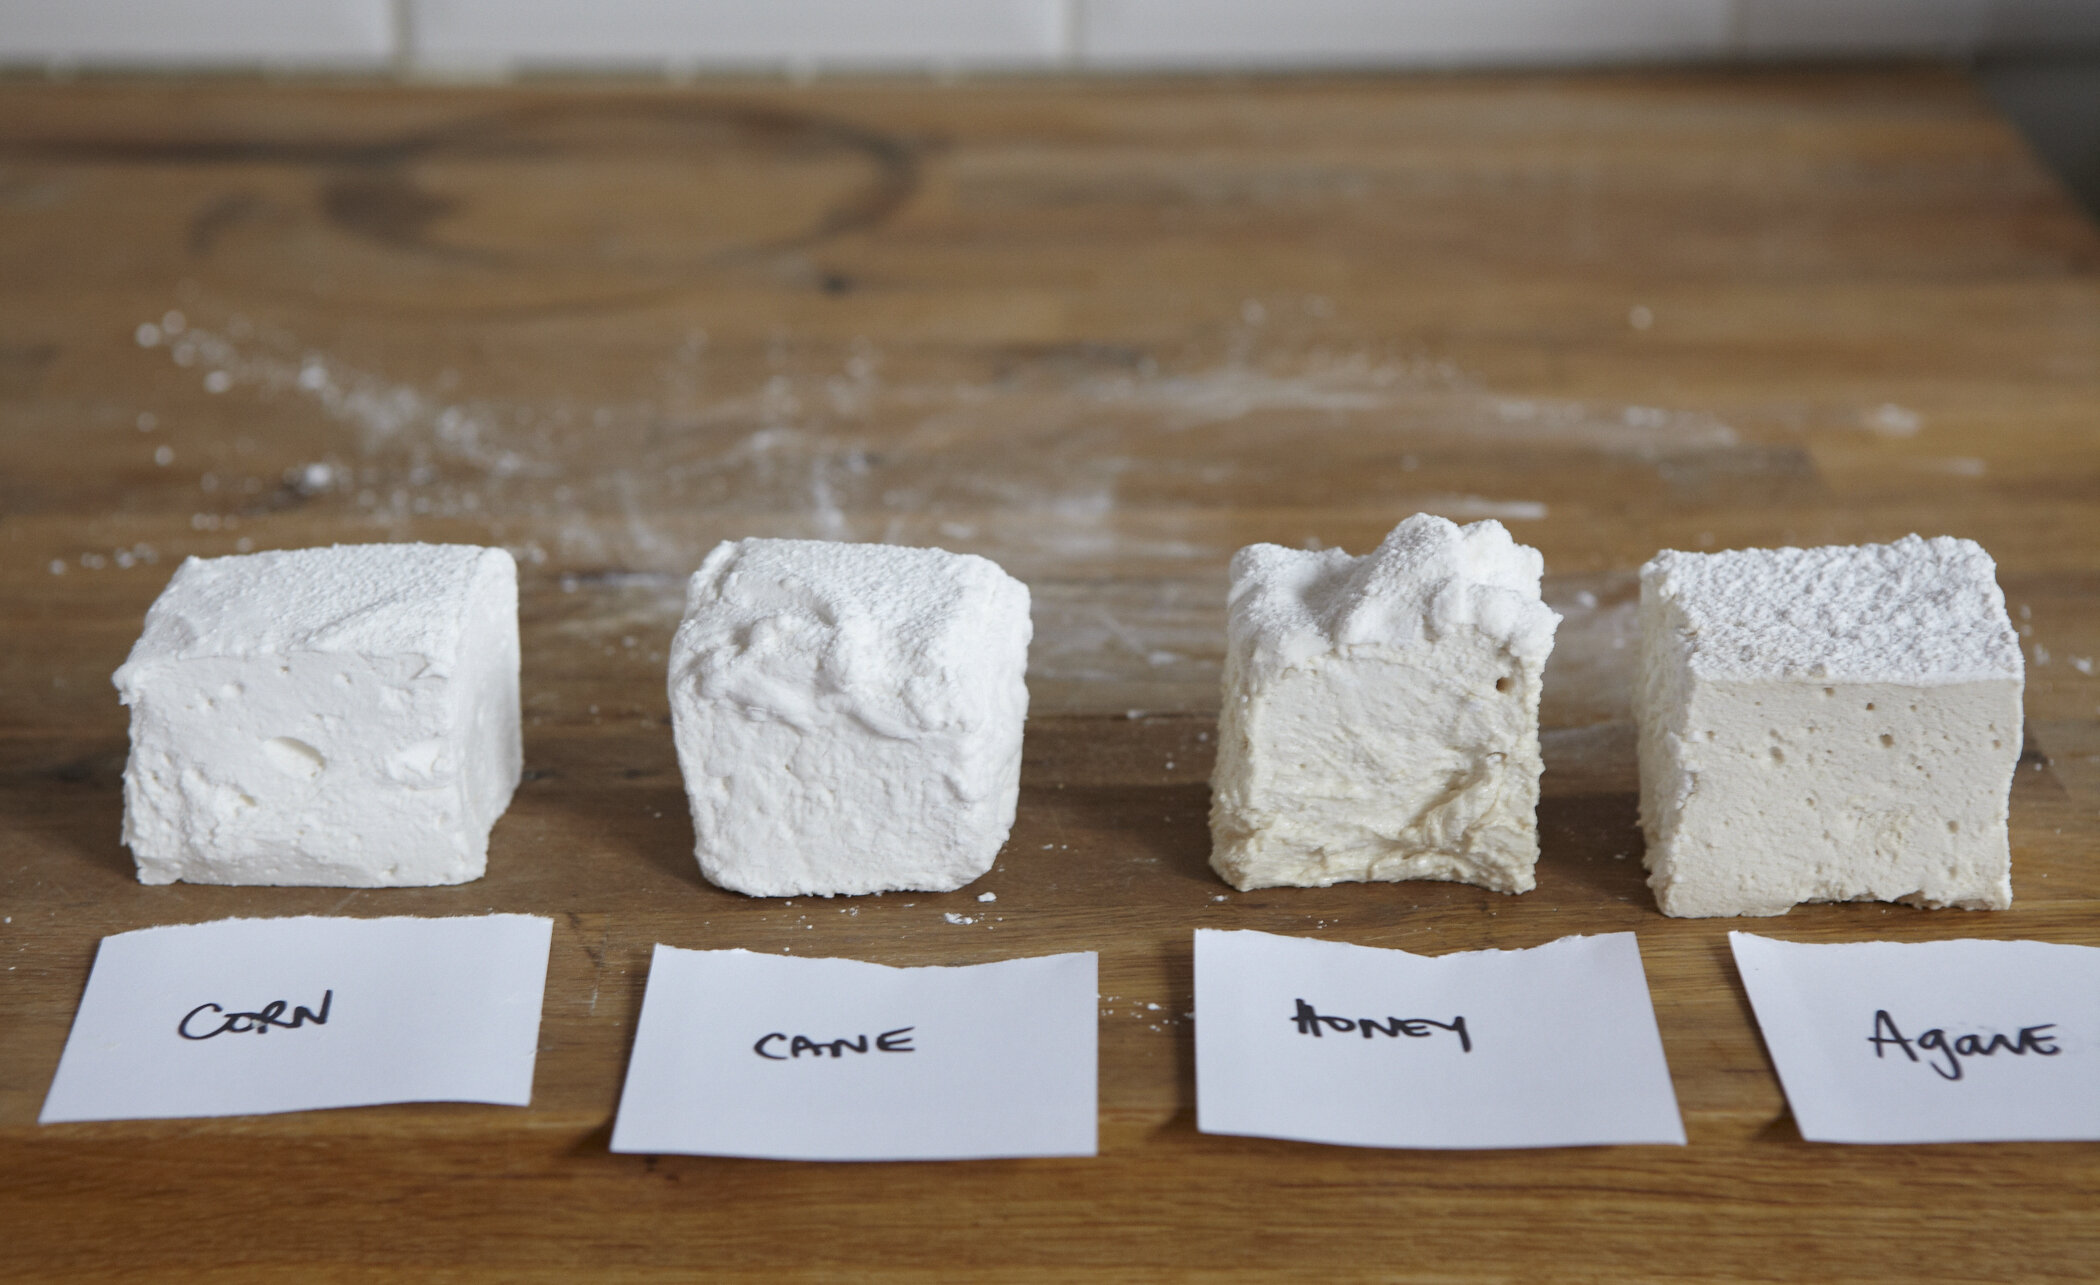
Huff post recipe, cooking marshmallows with different kinds of sugar
Real Food Dark Chocolate Marshmallows!
1 cup filtered water
1 cup local honey
3 tablespoons grass-fed gelatin
3/4 cup organic cocoa powder
1 tablespoon chocolate extract optional
1/2 teaspoon vanilla extract
1/4 teaspoon real salt
2 tablespoons arrowroot powder optional
Instructions
In large bowl (a stand mixer works best) sprinkle gelatin over 1/2 cup of the water. Let bloom.
In medium-sized saucepan, combine remaining water with honey. Heat over medium until boiling. Boil honey, stirring regularly, until it reaches 240°, or soft ball stage. It takes about 10 minutes.
Let honey mixture cool for a minute, then sift in 1/2 cup of cocoa powder, extracts, and salt. Mix until cocoa powder is melted in.
With mixer on low, slowly drizzle in honey/cocoa mixture. Once the honey is added, turn mixer as high as you can (I used speed 8 on my KitchenAid) and beat until color becomes pale and glossy and the marshmallow fluff can stand up in peaks. This should take about 15 minutes.
While the marshmallow is fluffing, grease a 9x9 inch baking dish and line it with parchment paper. Then combine the remaining cocoa with the arrowroot (or just use the remaining cocoa) and dust the parchment with a few teaspoons.
When the fluff is done, pour into the prepared pan, spreading as even as possible with a wet spatula.
Let set on the counter for about 8 hours (I usually do overnight).
Dust the top of the marshmallows with the leftover cocoa powder, and remove from the pan by pulling up on the parchment. Using a sharp knife, slice the marshmallows into squares. Alternately, you can use cookie cutters, if you want. Dust the knife with the cocoa in between slices, so the knife doesn't get too sticky and tear the marshmallows.
Store in the fridge in a covered container.

Chocolate Variation:
3 oz Cocoa butter or 2 tbsp coconut oil, but will be more melt-y
2 1/2 oz Unsweetened baking chocolate
6 tbsp Powdered erythritol
2 tbsp Inulin
1/4 tsp Liquid sunflower lecithin
1/8 tsp Sea salt
1 tsp Vanilla extract
Melt cocoa butter and baking chocolate in a double boiler over low heat.
Stir in the powdered erythritol, a little at a time. Stir in the inulin, a little at a time. Stir in the sunflower lecithin and salt. Heat until everything is smooth and dissolved.
Remove from heat. Stir in vanilla extract.
Pour the melted chocolate mixture into molds. Refrigerate 30 min
Simple Marshmallows with:
1 cup Water
¼ cup Natvia
3 Tbs Gelatin Powder
1 tsp Vanilla Essence
Marshmallow topping with:
1/2 cup Mascarpone Cheese
1/2 cup Heavy Whipping Cream
30 drops Liquid Stevia
1/2 tsp vanilla extract
Plus, these are the cutest. chocolate covered, but using almond flour
An amazing blog/podcast bringing herbalism & baking together!

If you’ve ever made a tea with mallow, it actually creates a quite thick mucilaginous liquid, that is super soothing to your thought and internal organs. I found this recipe to make a hair gel with just mallow tea and flax. Kind of cool to see what people make of it.

Sugar free Marsh mallows
1 Tbs marshmallow root powder
1 1/4 cup water
1 cup honey
2 Tb +1 teaspoon unflavored beef gelatin (optional, gives a tiny bit more structure. You can also use plant based gelatin)
1/2 t vanilla extract
Pinch of salt
Directions
1. Boil then simmer marshmallow root powder for five minutes. Remove from heat and Refridgerate until cool.
2. Drain marshmallow root decoction to eliminate clumps. Measure 1/2 cup of the marshmallow root decoction and add gelatin. Set aside.
3. Measure 1/2 cup marshmallow root decoction in a sauce pan on stove with honey, vanilla extract, and pinch of salt. Turn burner on to medium high heat. The mixture will boil. Insert candy thermometer into pot without letting it touch the bottom of the pot. Boil another 5-8 minutes until it reaches 240 degrees. Remove from heat.
4. Turn hand mixer on low and pour the hot marshmallow/honey mixture over the gelatin.
5. Turn the hand mixer on high and whip for another 5-8 minutes (mine was pretty much whipped at five minutes - if using stand mixer it may take longer).
6. Sprinkle coating over oiled (I just use a 1-2 tsp coconut oil and rub it with my fingers or lightly spray with spray-able coconut oil) and parchment-lined 8x8" pan (or bigger if you choose thinner marshmallows). Pour marshmallow creme on top and finish with more coating sprinkled. Let sit for several hours to set.
7. With a knife dipped in hot water, slice the marshmallows (the sides will be sticky for a little bit).
Coating (Optional)
1/3 cup Finely shredded Coconut
1/2 t marshmallow root powder
1. Toast over medium heat until coconut is slightly brown and fragrant.